Saturday, August 1, 2020

Overnight Sausage Pancake Breakfast Casserole aka Sausage McGriddle Bake


One of the most treasured things we love about our travels and road trips is breakfast. We love nothing more than finding mom & pop diners, cafes, and outposts to have some real authentic breakfasts.  Nothing says summer to me more than some good old fashioned, real down home cooking.


Well this summer, for obvious reasons, has been disappointing and very sad.  My heart breaks when we travel and I have seen all these places closed or go out of business.  We have been stuck with fast food drive throughs and quite frankly it's just not the same.


During our most recent trip, we couldn't even go in to sit down at fast food breakfast.  So there we were, in the middle of nowhere Wyoming, eating our McDonalds breakfast while standing up and tailgating in the parking lot with other families experiencing the same disappointment.  

I pray that this all changes sooner than later.  Until then, this breakfast casserole will take you right back to the first time you had a Sausage McGriddle with egg.  It is unreal how much this tastes like the famous breakfast sandwich.

*I will say one note; unless you are feeding a large crowd, I would half the recipe because it did not make great leftovers the next morning.

Also, this is designed for an overnight preparation, however I did it all in the morning and it still turned out amazing!  

Enjoy, stay healthy, and keep on sparkling this weekend!


Overnight Sausage Pancake Breakfast Casserole
Courtesy of @plainchicken

20 to 24 frozen pancakes from a 2lb-1oz. package, thawed
1 lb. ground maple breakfast sausage
6 eggs
1-1/2 cups heavy cream
1 cup whole milk
1 tsp vanilla
2 Tbl sugar
2 Tbl maple syrup, plus more for serving

Cut pancakes in half and place cut side down in a lightly greased 9x13 pan.

Cook sausage in a skillet over medium-high heat until no longer pink.  Drain fat.  Sprinkle cooked sausage on top of and in between the pancake slices.

Whisk together eggs, heavy cream, milk, vanilla, sugar, and maple syrup.

Pour egg mixture over pancakes.

Cover casserole dish and refrigerate overnight.

Remove casserole from refrigerator and uncover.  Preheat oven to 350 degrees.

Bake casserole uncovered for 50 to 60 minutes until center is set.

Let stand 5 minutes before serving with extra maple syrup.

Two Years Ago: No Post

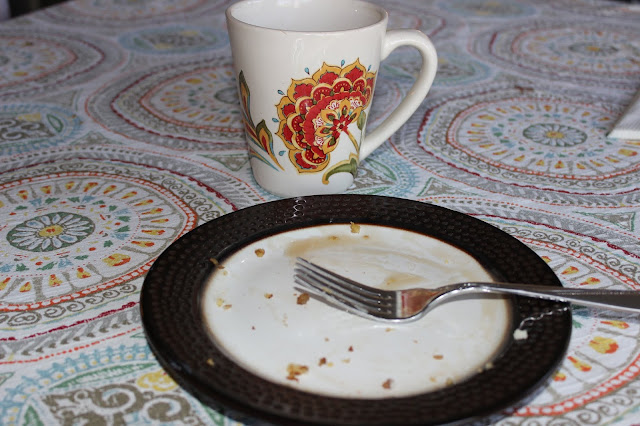
Clean plate...it's THAT GOOD!!!


Wednesday, July 29, 2020

Black Bean & Corn Salad with Chipotle-Honey Vinaigrette


While we were on vacation (with 19 relatives, I may add), the bonus is that we all get to learn and try out new recipes from each other.

Brother Mike, brought his A game and took the challenge to cook his famous Mike's Marinating Mess chicken dinner for all of us the first night.  No room to be had on this bbq!


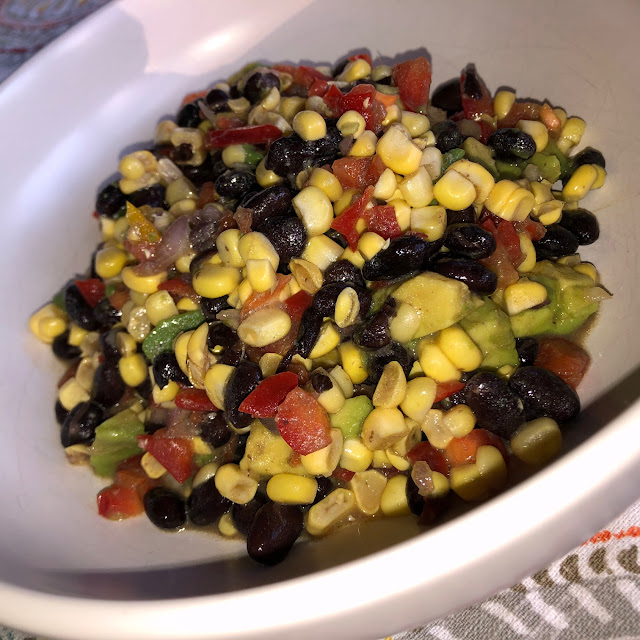
On the last family night, we decided to do Carne Asada for everyone with a fiesta theme...and many margaritas in store.  Sister Cathy made this incredible salad/dip which reminded me a lot of Cowboy Caviar.  It was so good that I made it again...and again, when we returned home!


In other news, (because there isn't enough excitement happening in our world), I had a dental emergency the other night.  I got a piece of food stuck between two of my teeth.  I tried to floss and it snapped off.  Now I had food AND floss stuck between my teeth.  I tried another piece of floss...SNAP!  Then by a desperate attempt, I tried a toothpick...SNAP! By this time it felt like a piece of plywood was separating my teeth and ruining all my orthodontic history.  I wanted to cry I was in so much pain.  Of course, I go into instant panic mode.  What am I going to do?  Is there an emergency dentist nearby?  Will my insurance cover this?  What if it doesn't?  What if I have to try to go through the night in this pain?...and on, and on, and on!!!


Once I calmed down and started thinking clearly, I was able to get it all figured out.  It was 9:30 at night and I jumped online to find out the nearest drug store that would still be open.  I had no idea what was going to get this mess out of my teeth...so I bought everything on the dental shelves!  It took every single one of these items to fix my emergency, and all was well once again.  Ugh!

Continue to stay safe, healthy, and sparkly!

Black Bean & Corn Salad with Chipotle-Honey Vinaigrette
Courtesy of Once Upon A Chef

For Salad:
2 ears fresh corn
1 cup chopped red onion
1 (14.5) ounce can black beans
1 red bell pepper, diced (about 1 cup)
1/2 cup loosely packed fresh chopped cilantro
1 avocado

For Dressing:
2 Tbl red wine vinegar
2 Tbl fresh lime juice, from 1-2 limes
2 Tbl honey
1/4 cup plus 2 Tbl vegetable oil
1 large garlic clove, roughly chopped
1/4 tsp dried oregano
3/4 tsp cumin'3/4 tsp salt
1/4 tsp black pepper
2 canned chipotle peppers in adobo sauce (2 peppers, not 2 cans; use smaller peppers and if they are all large, then just use only 1-1/2)

Bring a large pot of salted water to a boil.  Add the corn, cover, and turn the heat down to low.  Simmer for 10 minutes.  Remove the corn from the water and let cool.

Meanwhile, place the chopped red onions in a small bowl and cover with water.  Let sit about ten minutes, then drain completely in a sieve and set aside.

Place the beans in a sieve; run under cold water to rinse well.  Let drain completely and set aside.

Holding the cooled corn upright  in a large bowl, cut the kernels off the cob in strips.  Add the beans, red onion, red bell pepper and cilantro.

Make the dressing by combining all of the ingredients in a blender or mini food processor; process until smooth.

Pour the dressing over the salad and toss Well.  Cover and refrigerate for a least 1 hour or, preferably, overnight.

Right before serving, slice the avocado in half.  Remove the pit; using a butter knife, cut a grid in each half.  Holding the avocado halves over the salad, use a spoon to scoop out the diced flesh.  Toss the salad gently, then taste and adjust seasoning if necessary.  Add a squeeze of fresh lime, to freshen in up.  

Serve cold.

Two Years Ago: No Post
Four Years Ago: One Skillet Tuscan Chicken

Saturday, July 25, 2020

Scratch Waffles


Every weekend (and most days), my husband gets up around 4:30 am.  I do not...repeat...I absolutely do not get up that early on weekends or any other day for that matter.  With my "wackadoodle" sleep pattern right now, I am lucky to be getting back to sleep by 4 am.

When I finally rise out of bed and come out to the kitchen for my prepared cup of java, my husband always make sure that the drapes are open for me, to let in God's beautiful sunshine, which I do love to see every morning.


This one particular morning something looked off.  I couldn't quite figure it out, as I was still a little sleepy and coffee hadn't quite kicked in yet.  Do you see it?  Look closer...


Look very close...now you see it!  Are you kidding me?!?!?!  What in the world possessed him that early in the morning to actually go out to the garage, grab Brinkley's old dog collar and use it as a curtain tie?  (Which looking at the dog tag reminds me, I forgot to register our dogs with the Town this year...oops).


Well, at least Brinkley's celadon collar matches the curtain fabric...I do love that color, it's so calm and soothing.


In addition to my morning sunshine, we always make sure to have Sunday morning family breakfast together.  He knows that family meals are very sacred to me.  We always let "Baby B" select the menu, as she is our breakfast girl.


As you can see, this recipe has been around for about 30 years.  I finally asked him, "Is this one of your family's old recipes?"  His response, "No".  "I think I found it in an old Betty Crocker cookbook a long time ago."  We actually don't really know...

Have a blessed week and continue to be safe, healthy, and sparkly!


Scratch Waffles
Celebrating Weekends

1-3/4 cup all-purpose flour
3 tsp baking powder
1/2 tsp salt
2 egg yolks, well beaten
2 egg whites, well beaten
1-3/4 cup milk (whole or 2%)
1/2 cup canola oil
1 tsp vanilla

In a large bowl, mix the flour, baking powder, and salt.

In a medium bowl, whisk the egg yolks, milk, canola oil, and vanilla.

Add the wet ingredients to the dry ingredients.  Use an electric mixer to combine.

Fold in the egg whites.

Pour into your waffle maker and cook until done.

* Option, add your favorite fresh fruit or nuts to batter before closing waffle iron lid.

Two Years Ago: No Post
Three Years Ago: Watermelon Bruschetta
Four Years Ago: One Skillet Tuscan Chicken


Wednesday, July 22, 2020

Pork Loin Roast and Plethora of Parsley


As previously mentioned, my garden is exploding with greenery, specifically parsley!  I cut it all back and put it in a vase to preserve while I figure out what the heck to do with all of it.  I went back out this week to water the garden, and the plant has completely regrown!  Looks like all my dishes will be sprinkled with pretty parsley leaves...for the next year!


Wishing you all are staying safe, healthy, and...sparkly!  Stay strong friends!


Pork Loin Roast
Courtesy of cafedelites.com

Pork Loin:
4-5 pound pork loin roast, trimmed of skin and fat
1-1/2 Tbl olive oil, divided

Rub:
2 tsp paprika
1 tsp brown sugar
1 tsp each garlic powder and onion powder
1/2 - 1 tsp red chili powder
2 tsp coarse salt
1/2 tsp black cracked pepper

Honey Garlic Butter Sauce:
1/2 cup honey
1/2 cup unsalted butter
6 cloves garlic, finely chopped or mined
3 Tbl low sodium soy sauce
2 Tbl rice wine vinegar
pinch of salt
1/2 tsp cracked black pepper

Additional:
1/2 cup low sodium stock (or brown), beef or chicken
1/2 cup water
2 tsp cornstarch

Pat dry pork with paper towel.  Combine 1 Tbl of oil with rub ingredients.  Season pork, rubbing the mixture into the meat.

Heat remaining oil in a large pan or skillet over medium heat.  Sear pork all over until golden browned, rotating the pork around to avoid spices burning.  Remove from pan place in a 6-qt slow cooker.  

Melt butter in the same pan the pork was in while scraping up any leftover bits in the pan.  Add garlic and saute for 1 minute until fragrant.  Stir in remaining sauce ingredients; bring to a rapid simmer for 1 minute.

Pour sauce over pork; cover with lid and cook on LOW heat setting for 4-5 hours.

Transfer pork onto serving dish and tent loosely with foil.  Let rest for 5 to 10 minutes.  

While pork is resting; pour juices from the slow cooker bowl into a pot large enough to fit the liquid.  Bring to a simmer over medium-high heat.

Mix 2 Tbl of the juices with 4 tsp of cornstarch.  Whisk cornstarch slurry into sauce and let simmer for a good 5 minutes, or until thickened into a syrup-like consistency.

Slice pork and serve drizzled with Honey Garlic Butter Sauce.

Served with grilled zucchini slices...delicious!!


Two Years Ago: No Post
Four Years Ago: One Skillet Tuscan Chicken
Seven Years Ago:  Colorado and Pickling Cucumbers

While on one of my "work breaks", I found my missing slipper in the guest dog's room.
Looks to me that someone was also in a very restless nap mode?


Monday, July 20, 2020

You Gotta Love Spaghetti and Meatballs


Life has been non-stop since our return home from Oregon.  Work, home, landscaping, construction...all moving at a rapid pace.  Last week I felt like Henry Hill from "Goodfellas" and the infamous Sunday, May 11, 1980, (of course, without the helicopter, guns, or drugs though).  We have been go, go, go from sunrise to sunset.


Our garden is flourishing beautifully with roses, vegetables, and herbs.  We have started harvesting some and enjoying the fruits of our labor, as it were.


Watching Goodfellas got me in the mood to make meat gravy, as they call it.  I clipped some of my sprouting basil and enjoyed our Sunday pasta night!

Have a blessed, healthy, and sparkly week!


You Gotta Love Spaghetti and Meatballs
Courtesy of Emeril Lagasse

10 cups of your favorite red pasta sauce

1 large egg
1 pound lean ground beef
1/2 cup finely chopped yellow onion
1 tsp minced garlic
1/2 tsp dried basil
1/2 tsp dried oregano
1/2 tsp dried parsley
1/4 tsp ground black pepper
2 Tsp yellow mustard
1 tsp ketchup
1/2 tsp Essence or Bam seasoning
1/2 tsp salt

1 Tbl fresh basil, chopped

Pour your sauce into a large, heavy pot.

Bring to a simmer over medium-high heat, stirring occasionally.

Place all the remaining ingredients in a large mixing bowl.  Stir well with a long-handled wooden spoon to combine.  (I used my Kitchen Aid mixer with the dough hook...worked perfect!)


Wash hands well and/or use food prep gloves, then roll 1 Tablespoon of meat between them to form meatballs.  Gently place meatballs into the sauce one by one, using a long-handled wooden spoon, giving them space in between.  Be careful, bubbling sauce splatters!


Simmer the sauce uncovered, and allow the meatballs to rest undisturbed for at least 10 minutes before stirring.  When the meatballs rise to the top, it's okay to stir.

Stir the sauce and meatballs.  Simmer for an additional 20 minutes and stir occasionally to prevent the sauce from sticking to the bottom of the pot.


Using oven mitts or pot holder, remove the sauce from the heat and serve immediately over cooked spaghetti.  Sprinkle with freshly chopped basil.

One Year Ago: Cajun-Rubbed Triangle Steaks with Shrimp & Remoulade
Two Years Ago: No Post
Three Years Ago: Peaches & Cream Prosecco Cake...Happy Blogversary!
Four Years Ago: One Skillet Tuscan Chicken
Five Years Ago:  Spaghetti Squash Fritters and White Sangria Sparkler
Six Years Ago:  Chicken and Black Bean Enchilada Bake
Seven Years Ago: For Yesterday, Today and Tomorrow

My latest sweet obsession "Blue Bell Red Velvet Cake Ice Cream"...pure bliss!!
I try to be very good with my portion control.  I put just a couple tablespoons in my smallest dish...otherwise, I will take on the entire pint in one sitting...it's that amazing!


Wednesday, July 15, 2020

Honey Lime Chicken Enchiladas and BLT Slaw with Cilantro Lime Crema


I have recently returned from my summer hiatus in Sunriver, Oregon.  This is such a special place for our family and truly one of our favorite vacation destinations.  Whenever we have an opportunity to go, as I arrive I am instantly calmed and never want to leave.


I am trying to take full advantage of spending time with the girls, because before we know it, they will have their own families and busy lives.  (Although, I completely intend to smother and love their families when that time comes.)


When we leave for any extended amount of time, I take out a second mortgage to pay for the dogs' sleep away camp resort.  We learned our lesson the last time we left town, had our house sitter in charge of the dogs, and Kylo ate the drywall.  Trust me, the cost of puppy camp far outweighs the cost of home repairs thanks to these two.


Princess Brinkley and Kylo Zen clearly have the time of their lives there and never want to come home to our boring house.  We receive a report card everyday and feel comforted (as it should be) that they are in good hands.  Honestly, I look at their photos, and I want to go on summer vacation at their resort!


The downside of vacations is coming home.  It's not enough that you have to go back to your routines and work, complete 27 loads of laundry and remember that there is no food in your house because you made sure to eat and empty everything out of the refrigerator before you left.

So as I was tackling the wash, I had to leave the house to get more detergent (because of course I used it all before we left to make sure we had clean clothes for the trip).  When I returned home, I found my bra was shredded (like something out of "Criminal Minds") by someone who clearly was unhappy about not being back at their favorite camp.  Did I mention this was my FAVORITE BRA!  


Stay well and sparkly!


Honey Lime Chicken Enchiladas

1/3 cup honey
1/4 cup lime juice
1 Tbl chili powder
1/2 tsp garlic powder
2 pounds chicken, cooked and shredded (about 3-4 cups, rotisserie chicken works great)
8-10 soft taco size flour tortillas
4 cups shredded Monterey jack or cheddar cheese
2 cups green enchilada sauce
1 cup heavy cream

Preheat oven to 350 degrees.  Spray a 9x13 pan with cooking spray.

Mix the honey, lime juice, chili powder, and garlic powder together (reserve 1 Tablespoon of marinade for slaw - recipe below), and toss with the shredded chicken.  Let it marinate for 1/2 hour in resealable bag, or up to 8 hours.

Pour enough green enchilada sauce on the bottom of baking pan to create a thin layer on the bottom, about 1/2 cup.  Fill flour tortillas with the chicken mixture and a generous amount of shredded cheese, saving about 1 cup of cheese to sprinkle on top of enchiladas.

Mix the remaining enchilada sauce with the heavy cream and any leftover chicken marinade.  Pour sauce on top of the enchiladas.

Bake at 350 degrees for 25-30 minutes until brown and crispy on top.  Add the reserved 1 cup of cheese on top for the last 5 minutes of baking.

BLT Slaw with Cilantro Lime Crema
Courtesy of Carlsbad Cravings

Cilantro Lime Crema:

1 cup sour cream
2 Tbl mayonnaise
1/4 cup loosely packed cilantro leaves, minced
1 Tbl lime juice, or more to taste
1/4 tsp EACH ground cumin, garlic powder, and salt

Whisk together all of the ingredients.  Add one Tbl Cilantro Lime Crema to a large bowl for BLT Slaw.  Refrigerate remaining Crema.

BLT Slaw:

6 slices cooked bacon, crumbled
2 cups thinly sliced cabbage
1 large roma tomato, chopped
2 Tbl diced red onion
1 Tbl lime juice
1 Tbl Cilantro Lime Crema
1 Tbl reserved marinade (from honey lime marinade, above)

Add all ingredients EXCEPT bacon.  Toss until evenly coated.  Refrigerate.  Toss with bacon just before serving, so it stays crispy.


One Year Ago: Lemon Angel Cake Bars
Two Years Ago: No Post
Three Years Ago: Raspberry Crumb Muffins
Five Years Ago: Artichoke Gratin
Six Years Ago: Turkey Chili

This year's traveling ornament selection for 2020.


Saturday, June 27, 2020

Wonka Vision Cookies

The other day I needed to run out and do a few work errands.  While driving my iPad (let's face it we no longer have cars...we are all now driving computers), my daughter, Baby A, called me.

I touched my dashboard screen and answered her call.  I could hear her voice perfectly and I greeted her.  She immediately says to me, "Am I in your purse?"  It took me a minute for my brain to process what she was saying, and to figure all of this out.  Apparently, what I didn't realize was that she was face-timing me, but I couldn't see her since indeed, my phone was buried in my purse somewhere.  So there she was, "lost" in my purse and able to see everything in it. 

And then, without missing a beat, she says, "I feel like the kid from Willy Wonka and The Chocolate Factory."  I nearly lost it right there in my car from laughter.  You must be a kid from the 70's (or a kid whose parents were from the 70's and made you watch the movie all the time, because it's all about parenting).  Baby A was referring to the infamous scene of Wonka Vision, Mike Teavee,  and his demise in the movie.  It's a classic scene and my daughter nailed it with her clever comment!  This is a fantastic movie that everyone must see at least once in their lifetime.


I definitely needed that good laugh for a few moments.  Given everything that is happening in our world right now, a little humor is much needed medicine.  Things have been very challenging with work and life.  When I think it's just a tough day, that seems to turn into a week.  This too shall pass and will get through it.

Until then, I honestly feel that chocolate makes everything better.  To brighten my day, I baked cookies because it makes me happy.  It's comforting to know that with a little butter, some chocolate chips, and 10 minutes, life is good.

Stay well, healthy, and sparkly this coming week!


Wonka Vision Cookies
In Honor of Mike Teavee

2-1/4 cups all-purpose flour
1 tsp baking soda
1 tsp salt
1 cup (2 sticks) butter, softened
3/4 cup granulated sugar
3/4 cup packed brown sugar
1 tsp vanilla
2 large eggs, room temperature
1 cup mini semi-sweet chocolate chips
1 cup peanut butter chips
1 cup old-fashioned whole grain oats (aka, uncooked oatmeal)
1 cup chopped pecans

Preheat oven to 375 degrees.

Sift and combine flour, baking soda, and salt in a small bowl, set aside.  In a large bowl beat butter, granulated sugar, brown sugar, and vanilla extract until creamy.  Add eggs, one at a time beating well after each addition.  Gradually beat in flour mixture.  Stir in chocolate chips, peanut butter chips, dried oatmeal, and pecans.

Drop by rounded tablespoon onto a prepared baking sheet.

Bake for 9 to 11 minutes or until golden brown.  

One Year Ago: No Post
Two Years Ago: No Post
Three Years Ago: No Post
Four Years Ago: Rustic Chicken Marsala Bake

My baking assistant Princess Brinkley doing her recon for morsels.


Wednesday, June 24, 2020

Meal Train Manicotti

This week I got to visit my friend and her recovering husband again in the big city.  I was scheduled for my final meal train to them and was excited to cook for their family and see her beautiful, smiling face again...not to mention their Golden Retriever puppy that I am so in love with.


Since my last visit I prepared a Fiesta Dinner for them, this time I thought I would take the Italian approach.


Dinner

Caesar Salad

Tuscan Garlic Bread

Sausage and Cheese Manicotti

Brownie Desserts (which I had to confess I didn't actually bake these)

Breakfast

Fresh Fruits


This Manicotti is so incredibly easy and came to me from my friends Doug and Lois, who also gave me the Empanada recipe.  Doug taught me a trick to making these that is seriously a game changer (plus I came up with my own culinary hack)!  I have always been intimidated by manicotti and struggled with stuffing them...not any more!


Sausage and Cheese Manicotti
Courtesy of Doug and Lois

1 lb. ground Italian sausage
2 cloves minced garlic
2 cups creamed, small curd cottage cheese, pureed
24 ounces Mozzarella cheese
1/2 tsp salt
1 cup mayonnaise
28 Manicotti noodles (1 box = 28 noodles)
16 ounce jar of your favorite spaghetti or marinara sauce
1 tsp dry oregano leaves
4-6 ounces Parmesan cheese, finely shredded

Preheat oven to 350 degrees.

Brown Italian sausage and garlic, drain fat.

In a large bowl, mix cottage cheese, Mozzarella cheese, salt, and mayonnaise.  Add sausage mixture and blend well.


Boil noodles according to package directions.  Drain and lay on a non-stick sprayed foil sheet to cool.

***Cut each cooked and cooled noodle in half, width-wise.


Prepare a 9x13 baking dish with non-stick spray.  


Hold noodle flat side down, flush with hard surface prep area.  Fill each noodle with the stuffing mixture by hand or **use a small cookie scoop. You will use about 2 Tablespoons for each noodle.


Pour about half of the spaghetti/marinara sauce in bottom of prepared baking dish, just to cover.

Place the stuffed shells in sauce.


Cover shells with remaining sauce.  Sprinkle with oregano and Parmesan cheese.


Cover with foil and bake for 15 minutes.  Remove foil and bake another 15 minutes, until sauce is bubbling.

Enjoy!  Be healthy, well and stay sparkling!


In order for the most sanitized cooking area, after mopping the floor, I had to quarantine myself in the kitchen.  I pulled out our 2 largest baby gates and trapped myself in (or trapped the dogs out), however you choose to look at it.  Needless to say there was much pouting involved with the two of them and Kylo Zen thought he could mesmerize me with those brown puppy eyes.

One Year Ago: No Post
Two Years Ago:  No Post
Three Years Ago:  No Post