Wednesday, December 4, 2019

Cheese Stuffed Bacon Wrapped Jalapenos and Cheryl's She-Shed

Let the holiday parties season begin!  What are some of your favorite party foods?  I diligently set out try a new appetizer every year, so as to not get stuck in my usual repertoire rut. 


If you catch any amount of television, you of course know about Cheryl and someone trying to burn down her "She Shed".  I absolutely love that ad!...and I want my own Suzie's She Shed!

I saw this photo on the internet recently and could not stop laughing!  My daughters were too old when the whole "Elf on the Shelf" started, so I loved this adult version's sense of humor!


I am also loving this new appetizer that our friends Doug and Lois brought one night.  It has a kick, but in a good way.  Now it's not hot enough to burn down Cheryl's She-Shed, but it'll light your fire!


Stuffed Bacon Wrapped Jalapenos
Courtesy of Doug and Lois
Makes 12 servings

4 ounces (1/2 block) cream cheese, room temperature
1/8 cup shredded cheddar cheese
1/8 cup shredded gouda cheese
salt and pepper to taste
onion powder, just a dash
6 jalapeno peppers
6 pieces of bacon, cut in half lengthwise

Preheat oven to 400 degrees.

Cut a bit of stem off the jalapeno.  Cut jalapeno in half lengthwise and carve out ribs and seeds.

Mix the cheeses together with salt, pepper, and onion powder.

Spoon filling into the jalapeno peppers.  Wrap with bacon.

Place on baking sheet and bake for 25-30 minutes, until the bacon starts to crisp.


One Year Ago: Blue Flurry
Two Years Ago: No Post
Three Years Ago: Zucchini Lasagna Roll-Ups
Four Years Ago: Holly Jolly Buckets
Five Years Ago: Pecan Pie Bites
Six Years Ago: World's Best Lasagna


Saturday, November 30, 2019

Maple BBQ Glazed Bacon Wrapped Shrimp and Roasted Butternut Squash Risotto

We did it...we survived a record breaking blizzard and Thanksgiving all in one week!  How was your holiday?  During the past two weeks, I accomplished baking 47 loaves of mini pumpkin breads and sent to various states, and I can say that I am officially done with fall...


We hit up a couple stores and did some pre-Christmas shopping to take advantage of some amazing deals out there.  We also went to a Thanksgiving matinee movie, which I thought was a great idea and no one would be there...turns out many others had the same idea.  Nonetheless, we had a fun day together.  I enjoyed my annual "movie theater buffet" with one of my daughters.  It's the only time of year we completely gorge on everything that is bad...(but so good at the same time).

Since I have done my fair share of cooking these past few days, I needed a quick and easy dinner this weekend.  This was inspired by a Sur la Table menu and I absolutely love it.  The pairing combination is the perfect way to end the fall season.  The Maple BBQ Shrimp can be done as an appetizer, but I decided to serve as dinner with the risotto.  Truth be told though, I did take many shortcuts for the risotto, but only you and I will know that.  Enjoy!

Maple BBQ Glazed Bacon Wrapped Shrimp
Courtesy of JoCooks.com

1 lb. jumbo shrimp (about 18)
1/4 cup maple syrup
1/4 cup BBQ sauce, store bought
1/2 tsp salt
1/4 tsp pepper
9 slices bacon thin cut, cut in half
1 Tbl chives, chopped

Preheat oven to 375 degrees.  Cover a baking sheet with aluminum foil.  Place a cookie cooling rack on top of the baking sheet.  This will help the bacon crisp up all around the shrimp.

Remove the shells from the shrimp, but keep the tail on.   - I removed the tails for dinner, but if you're serving as appetizer, you can leave the tails on.  Devein the shrimp using a pairing knife, if you didn't already buy the shrimp deveined.  

In a small bowl whisk together the maple syrup and BBQ sauce.  Season the shrimp generously with salt and pepper.

Wrap each shrimp with a piece of bacon.  Lay the bacon wrapped shrimp on the prepared sheet with the seam side down.  Repeat with remaining shrimp.

Brush each bacon wrapped shrimp generously with the maple syrup and BBQ sauce mixture.

Bake the shrimp for 15 minutes.  Then turn the broiler on and broil for 2 to 3 minutes. more.  You basically want to make sure the bacon is crisped up enough.

If preferred, once the shrimp is cooked, brush with additional maple syrup and BBQ sauce mixture if you have any leftovers.  Garnish with chopped chives and serve.

For The Risotto:
1 lb. butternut squash, outer skin and seeds removed, then cut in cubes
1 box Lundberg Creamy Parmesan Risotto

Preheat oven to 400 degrees.  Line a baking sheet with foil.

Toss butternut squash in a large bowl with 2 tablespoons olive oil and season with salt and pepper.

Spread evenly on baking sheet and roast for 25-30 minutes until tender and lightly browned.  

While the butternut squash is roasting, prepare the Risotto, according to package directions.

When risotto is done and butternut squash is ready, combine the two.  

Serve with Maple BBQ Glazed Bacon Wrapped Shrimp

Two Years Ago: No Post
Four Years Ago: Wassail
Five Years Ago: Apple Pie Martini


Wednesday, November 27, 2019

Suzie's Cornbread and Snowmageddon


Here is the latest Wikipedia definition of "Snowmageddon"...Snowmageddon, Snowpocalypse, and Snowzilla are portmanteaus of the word "snow" with either "Armageddon", "Apocalypse", and "Godzilla" respectively.

Whatever the heck it was, it hit us hard yesterday...24" high to be exact.  My poor husband had to fire up the snow blower (thank God we have one), three separate times yesterday to try to stay ahead of it.
It started on Monday night, came through with a fury and did not stop snowing until mid-afternoon yesterday.


Princess Brinkley and Kylo though, had the time of their life in the powder.  They could not get enough of running and tackling each other in the snow.  Look at those smiles!...or are those fangs??


My husband was never much of a cornbread fan, until he had my cornbread.  If you are looking for last minute side dish for tomorrow's Thanksgiving dinner, here's your ticket to awesomeness!  This is so easy and full of delicious flavor.  We serve this all year long...with rib night, chili, and it goes equally great with tri-tip or grilled chicken.  My husband worked so hard on clearing everything out for us, I may have to make his own special pan just for him.

Wishing you all Blessings and a Happy Thanksgiving!


Suzie's Cornbread

1 package Jiffy Corn Muffin Mix
1 egg
1/3 cup milk
1 (4 oz) can diced green chile peppers
1 (14 oz) can corn, drained
1/2 cup Mexican Style blend shredded cheese

Preheat oven to 400 degrees.

Mix all ingredients in bowl and set aside.  Spray non-stick baking spray into 8" round or square baking pan.  

Pour batter into prepared baking dish.  Bake 20-25 minutes, until baked through.

Two Years Ago: No Post
Three Years Ago: Double French Toast
Four Years Ago: Wassail
Five Years Ago: Apple Pie Martini
Six Years Ago: Juicy Apple Popovers


Saturday, November 23, 2019

Blueberry Sour Cream Coffee Cake


If you have friends or relatives coming for Thanksgiving next week...or starving college students, you know how crucial it is to stock up on the pantry and refrigerator.  I am no exception.  Since it is just me and my husband at home now, I've been neglecting my pantry as of late.

I recently went to the grocery store to replenish for our girls' arrival and my total was more than most car payments...ouch!  Nonetheless, it beats hearing "there's nothing to eat here"!  Who am I kidding, three days into their stay that's exactly what they will be whining to me.

This coffee cake will make everyone happy when they wake up each morning, loving on the puppies with their coffee in hand and being slugs for the day in front of our fireplace.  I am really looking forward to a week with them in the house again.

Blueberry Sour Cream Coffee Cake

For the cake:
2 cups Original Bisquick baking mix
2/3 cup milk
2 Tbl sugar
1 egg
1 Tbl flour
1/2 cup Greek yogurt or sour cream
1 cup blueberries, fresh or frozen
1 Tbl freshly grated lemon zest

For the Streusel topping:
1/3 cup Original Bisquick baking mix
1/3 cup packed brown sugar
1/2 tsp cinnamon
2 Tbl butter, softened

Heat oven to 375 degrees.  Grease a 9 inch round pan.  Make Streusel; set aside.

Stir remaining ingredients until blended.  Spread in pan.  Sprinkle with Streusel.

Bake 18 to 25 minutes or until golden brown and full baked throughout.

One Year Ago: Emeril's Smothered Shrimp and Chorizo over Grits
Two Years Ago: No Post
Three Years Ago: No Boil Slow Cooker Mashed Potatoes
Four Years Ago: Wassail
Five Years Ago: The Hobbit's Famous French Sandwich
Six Years Ago: Whipped Feta Crostini


Wednesday, November 20, 2019

Garlic Brown Sugar Pork Chops and The Chap Stick


The holidays are rapidly approaching and I am slowly feeling the stress start to set in.  The reason I know that I am feeling stressed is because I am doing stupid things more frequently.

Last week, I was getting ready for work.  I was trying to get dressed while brushing my teeth, which never ends well for me.  When I was all dressed and had my fresh teeth set, I realized I was rushing so much, that I forgot to put my deodorant on.  I grabbed my "chap stick", took off the lid and headed into my shirt (as if to put the chap stick on my underarms)...as a side note, whenever I finish brushing my teeth, I put on my Burt's Bees lip balm.  Honest mistake right?  Accidentally grabbed my lip balm instead of deodorant.  Everyone has made that mistake at least once, right?  Dear Lord, give me strength!

Garlic Brown Sugar Pork Chops

(2) bone in thick pork chops about 1 inch thick
3 Tbl garlic, minced
2 Tbl canola oil
4 Tbl butter
1/2 tsp red pepper flakes
3 Tbl brown sugar
salt
pepper
fresh Italian flat leaf parsley, chopped

Heat oven to 400 degrees  Season pork chops with salt and pepper.

Heat canola oil in an oven safe skillet on medium high heat.  Sear the pork chops for 3 minutes on each side.  Remove and set aside.

In the same skillet reduce heat to low an add butter, garlic, brown sugar, red pepper flakes, and whisk until combined, simmer for 2-3 minutes.  Add pork chops back into the pan and coat with sauce.

Bake 8-10 minutes or until internal temperature of pork chops reaches 140F.

Remove pork chops and let rest 5 minutes.  Garnish with fresh chopped parsley and serve over Asiago risotto.

One Year Ago: Mushroom Orzo Pasta
Two Years Ago: No Post
Three Years Ago: Pumpkin Pie Crunch
Six Years Ago: Cranberry Bliss Bars


Saturday, November 16, 2019

Bourbon Glazed Salmon, Bagels, and Birthdays


My "day job" lets me set up company lunches and breakfasts from time to time.  I like to think of myself as the office party planner and decorator.  Every Monday morning I also put together a buffet in our kitchen of cut fruits/veggies and healthy snacks for everyone to graze on all day.  In addition, for each person's birthday, I decorate said persons' desk and/or door.

The most recent meeting request was for a breakfast meeting.  Bagels.  Lox.  No problem, I got this!


I have never had lox and bagels, so I had to do some culinary research.  I didn't know lox and bagels required a full salad bar to go with it.


I pulled out all my catering dishes and brought in some of my linens for the occasion....you know, because I am fancy like that.  I even chilled down the glasses for everyone's orange juice.


Growing up I never really appreciated salmon or had an acquired taste for it.  Now though, I love it for dinner!  

This glazed version is so delicious and easy to prepare after work during the week.  Enjoy!


Honey Bourbon Glazed Salmon

1/3 cup honey
1/3 cup bourbon whiskey
2 Tbl brown sugar
2 Tbl soy sauce
1 tsp whole grain mustard
1 Tbl finely mined or grated fresh ginger
1 medium clove garlic, finely minced
1/4 tsp red pepper flakes
1 Tbl fresh lime juice
4 (6 ounce) salmon filets
salt
freshly ground black pepper
Preheat oven to 350 degrees.

Combine honey, bourbon, brown sugar, soy sauce, mustard, ginger, garlic, and red pepper flakes in a small pan.  Bring mixture to a boil over medium high heat, stirring continuously.

Reduce heat to medium and boil for about 5 minutes, stirring frequently.  Mixture should be that of syrup consistency and reduced by half.  Set aside.

Line a cookie sheet with foil and spray with non-stick spray.

Place salmon filets on prepared cookie sheet (skin side down).  Season salmon lightly with salt and pepper.  Brush with half the sauce on top and sides.  Bake for 10 minutes.

After 10 minutes, remove pan from oven and brush with remaining bourbon sauce.  Put back in oven and continue baking until fully cooked through (approximately another 10-15 minutes, depending on thickness of filets).  Fish is done when easily flaked with fork in the middle.

Two Years Ago: No Post
Three Years Ago: Pumpkin Pie Crunch
Four Years Ago: Savory Roasted Peppers

One of my bosses is known for his crazy socks.
I couldn't resist for his birthday door decorations this year!


Wednesday, November 13, 2019

Apple-Cider Doughnut Cake and Color Obsessions


I currently have a color obsession that is taking over my life.  I tend to gravitate heavily to colors every year.  I love color!  I have never been one to be of the sterile, whites, or neutrals...I must have color around me...

Last year it was "Dark Taupe", specifically Sally Hansen's "Commander In Chic".  The year before that it was "Millennial Pink".  I have the purses, cardigans, and nail polishes to prove this!  It's becoming a serious problem.


This brings me to present day's obsession...this little leaf showed up in my fall tablecloth (which I also have a problem with...buying table linens...a lot of table linens).

Anyway I have been drawn to this color.  The problem is, what color is it?  Is it blue, steel gray, dark periwinkle?  I just had a manicure with it...polish name is "Denim Patch".  Is it a denim color?  It's driving me nuts...what Pantone color is this?


Of course, I innocently even stumbled on placemats in this color at my local thrift store...and then I see this duster cardigan sweater on Pinterest...that I must have but cannot find anywhere! 


Well, while I figure out (A) what color this is, and (B) how to score this duster cardigan...I bake. 

One of my daughters showed up this weekend with one mission:  Fall Baking!  My kitchen looked like Food Network's Holiday Baking Championship by the time she left back for college.  I was exhausted!  

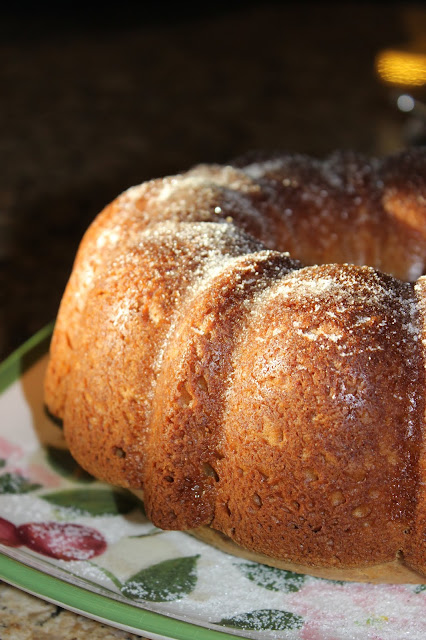
If you ever visit your local farmer's market in the fall and have one of their Apple Cider Doughnuts...this cake is the epitome of fall.  Oh my goodness!  

In addition to our first round of November's Suzie's Pumpkin Bread, we also made 2 of these cakes...one for my husband's office, (which didn't make it through the day) and we divided the other one up between our home and daughter's home for her roommates.

Happy Fall to you all and this season, add a little color to your life!


Apple-Cider Doughnut Cake
Courtesy of Martha Stewart

2 Tbl unsalted butter, melted, plus more for pan
2 cups unbleached all-purpose flour, plus more for pan
1 cup whole-wheat flour
1-1/2 tsp baking powder
1-1/2 tsp ground cinnamon
1/2 tsp baking soda
3/4 tsp kosher salt
1-3/4 cups natural cane sugar
1 cup apple cider
3/4 cup extra-virgin olive oil
3/4 cup unsweetened applesauce
2 tsp pure vanilla extract
3 large eggs, room temperature

Preheat oven to 350 degrees.  Butter and flour a 12-cup Bundt pan.  In a large bowl, whisk together both flours, baking powder, 1 tsp cinnamon, baking soda, and salt.  In another bowl, whisk together 1-1/2 cups sugar, cider, oil, applesauce, vanilla, and eggs.  Add egg mixture to flour mixture; whisk until combined.  Transfer batter to prepared pan.

Bake rotating pan halfway through, until a tester inserted in center comes out clean, 45 to 50 minutes.  Transfer pan to a wire rack  set over a rimmed baking sheet; let cool 15 minutes.  Meanwhile, mix together remaining 1/4 cup sugar and 1/2 tsp cinnamon.

Invert warm cake onto rack.  Brush with melted butter, then sprinkle liberally with cinnamon sugar.  Let cool completely before serving.  Cake can be stored, covered at room temperature up to 2 days.

Two Years Ago: No Post
Three Years Ago: Pumpkin Pie Crunch
Four Years Ago: Savory Roasted Peppers


Saturday, November 9, 2019

Braciole


Now that the holidays are rapidly approaching, you may be looking for a new recipe to add into your entertaining repertoire...and here it is!

This dish is relatively easy, if you plan accordingly...in other words, you don't want to rush this one. Your guests will be amazed and think you spent all day in the kitchen (which you actually will not need to).

Prepared correctly, this flank steak literally melts in your mouth..  Your home will smell phenomenal as your guests arrive to be greeted by you, ever so relaxed because you've got this whole holiday entertaining thing down!   Enjoy!


Braciole
Courtesy of Giada De Laurentiis

1/2 cup dried Italian-style bread crumbs
1 garlic clove, minced
2/3 cup grated Pecorino Romano
1/3 cup grated provolone
2 Tbl chopped fresh Italian parsley leaves
4 Tbl olive oil
salt and freshly ground black pepper
1 (1-1/2 pound) flank steak
1 cup dry white wine
3 1/4 cups Simple Tomato Sauce, store-bought marinara sauce (or your own recipe)


Stir the first 5 ingredients in a medium bowl to blend.  Stir in 2 tablespoons of the oil. 
 Season mixture with salt and pepper and set aside.


Lay the flank steak flat on the work surface.  
Sprinkle the bread crumb mixture evenly over the steak to cover the top evenly.  


Starting at 1 short end, roll up the steak as for a jelly roll to enclose the filling completely. 
 Using butcher's twine, tie the steak roll to secure.  Sprinkle the braciole with salt and pepper.

Preheat the oven to 350 degrees.


Heat the remaining 2 tablespoons of oil in a heavy large ovenproof skillet over medium heat.  Add the braciole and cook until browned on all sides, about 8 minutes.  

Add the wine to the pan and bring to a boil.  Stir in in the marinara sauce.  


Cover partially with foil and bake until the meat is almost tender, turning the braciole and basting with the sauce every 30 minutes.  After 1 hour, uncover and continue baking until the meat is tender, about 30 minutes longer.  The total cooking time should be about 1-1/2 hours.

Remove the braciole from the sauce.  Using a large sharp knife, cut the braciole crosswise and diagonally into 1/2 inch thick slices. 

 Transfer the slices to plates.  
Spoon the sauce over and serve.


One Year Ago:  Maple and Rosemary Chicken
Two Years Ago: No Post
Three Years Ago: Surprise Quiche
Four Years Ago: Cioppino
Six Years Ago: Pear Tart

My secret ingredient...Pasta Jay's Marinara Sauce!
I stock up my pantry with all this beautiful goodness...now available to order online, which I highly recommend, it's amazing! 


Wednesday, November 6, 2019

Chicken Cotoletta


As I have previously mentioned, I have been on a chicken overload as of late.  We are trying to do less red meat...seafood just gets too expensive every week....and also trying to cut back on the pasta as an entire meal...so there you have it, as they say, "winner, winner, chicken dinner!"

This one is actually so great!  Super simple to knock out on a weeknight after work and oh so yummy!  That squeeze of lemon at the end when you pull them right out of the skillet, just takes this dish to a different level.  I know what you're thinking..."easy, peasy, lemon squeezy!"  Yes, you are absolutely correct!  Enjoy.


Chicken Cotoletta
Courtesy of Anna O'Halloran and Tasty.com

1 lb boneless, skinless chicken breasts
1/2 cup all-purpose flour
3 large eggs
2 cups bread crumbs
2 Tbl fresh, flat-leaf parsley, chopped
1 clove garlic, minced
2 Tbl milk
kosher salt, to taste
black pepper, to taste
1/2 cup grated Parmesan cheese
2 Tbl unsalted butter
olive oil, for frying
lemon wedges, for serving

Slice the chicken breast in half lengthwise to create thinner cutlets.  Using the rigid side of a meat mallet, pound the chicken until 1/4-inch thick.

Add the flour, eggs, and bread crumbs to 3 separate, shallow bowls.

To the dish with eggs, add the parsley, garlic, and milk.  Season with salt and pepper.  Mix with a fork to combine.

Add the Parmesan cheese to the bread crumbs and stir to combine.

Working 1 piece at a time, coat the chicken cutlets in the flour, shaking off any excess, then the egg mixture, then the bread crumbs.  Set the coated chicken on a baking sheet lined with parchment paper and refrigerate for 1 hour.

Melt the butter in a large skillet over medium heat.  Add enough olive oil to come 1/4 inch up the side of the pan.  Working in batches, fry the chicken until golden brown, about 3-4 minutes per side.  Add more oil as needed for subsequent batches.  Drain the chicken on paper towels to absorb any excess oil.  Season with a pinch of salt.

Serve the chicken with lemon wedges.  Paired this dish with grilled zucchini slices.

One Year Ago: Cowboy Beans
Two Years Ago: No Post 
Three Years Ago: Surprise Quiche
Five Years Ago: Cherry-Cheese Galette
Six Years Ago: Pasta E Fagioli Soup


Saturday, November 2, 2019

Sonia's Stuffed Mushrooms and Making Friends with Food

My husband and I were having one of our debriefing nights last week after work.  I was reliving memories of a friend that I learned just passed away the night before...way too young.

Sonia was one of the first friends I made when I moved to the Palm Springs area after college.  We were co-workers and became good friends, then a couple years later roommates.  Sonia had impeccable taste and a true perfectionist.  She was a very talented designer and a kind, caring soul.


One vivid memory I have of Sonia during my college internship was her taking me to El Pollo Loco during our lunch hour.  Since I was from Alaska, I had no idea what this restaurant was...but I loved it! We spent these lunches getting to know each other and where we had both come from.  We laughed about our college experiences (as we both went to the same design school).  We talked about our dreams and plans for the future.

Sonia taught me the correct way to eat their 2 piece chicken platter.  First, you definitely must upgrade to the all chicken breast only plate...totally worth it.  Second, slather their frozen butter all over the flour tortilla before you fill it with the chicken, rice and beans.  Delicioso!!

Sonia was also an incredible cook.  She was famous for her turkey tacos and taught me this unbelievably, easy oven halibut that is amazing!  I also have her recipe for the best oven baked artichoke dip that I could just eat by the spoonful.


I also remembered these stuffed mushrooms that Sonia would make for every company potluck, baby shower, and "friendsgiving".  They are such a delectable treat.  I try to make them every year for either Christmas or New Years parties...or even just Friday nosh night at home.

Sonia will be very missed by all her loving friends and family.  I am still in shock, but pray and know that she is in a kinder, better place now.  I will definitely keep making her recipes and remembering her forever.

In honor of Sonia, I made her mushrooms this weekend.  I am so happy that she gave me her family recipe 25+ years ago.  As you can see from the photo of her original recipe she gave me, this has been well used...and yes that is melted butter stains all over it.  You know it's a good recipe when it is covered in its ingredients... wouldn't you agree?  More than that though, I truly am blessed that she was brought into my life.


Sonia's Stuffed Mushrooms

1-1/2 pounds large mushrooms (some small & large)
1 cup butter (2 sticks)
1-1/2 tsp salt
1 cup seasoned stuffing mix (crushed with rolling pin)
1 cup Mozzarella cheese, finely shredded
1 cup minced fresh onion
4 garlic cloves, minced
4 Tbl minced parsley
1/4 tsp Oregano

Pull stems and chop up mushrooms, wash and soak in water the rest.  When caps are clean, lay out on towel and dry well.

While mushroom caps are drying, cook chopped stems with butter, onion, salt, parsley, oregano, and garlic for 5 minutes.

Stir in stuffing crumbs and cheese.

Take off stove and spoon in mushroom caps.

Put oven rack at lowest level.  Broil for approximately 8 minutes, watching them carefully so as to not burn.

The secret ingredient to this...Stove Top Savory Herbs Stuffing!


One Year Ago: Cowboy Beans
Two Years Ago: No Post
Three Years Ago: Surprise Quiche
Five Years Ago: Creamy Artichoke Bruschetta