Friday, May 5, 2023

Deconstructed Chicken Enchiladas and Dishes Addiction


We have hit that quarterly milestone where I am trying to purge, purge, purge pantry, refrigerator, and freezer.

What a better way to celebrate Cinco de Mayo than with a kitchen combo creation to use up those last few tortillas, half bag of shredded cheese, 1/4 container sour cream...I think you get the picture now.

As an added bonus, I get to use my fun "new" plates that I discovered at our local Habitat for Humanity Store.  This store is the greatest (and the worst) thing that has happened to me since moving to B-Town five years ago.  I really do need addiction help from buying dishes.  Come on though...how great area these plates!

Deconstructed Chicken Enchiladas

1 Tbl olive oil
1 onion, chopped
2 Tbl mined garlic
1 tsp ground cumin
1/2 tsp salt
1 large tomato, diced
(2) 10-ounce cans red enchilada sauce
1/4 cup sour cream
1/4 cup chicken broth
8 +/- corn tortillas, cut into small triangles
4 cups shredded, cooked boneless, skinless chicken breasts
8 ounces Pepper Jack shredded cheese

Preheat oven to 350 degrees.

In a medium size skillet, add the olive oil over medium heat.

Add the onion, garlic, cumin, salt, and tomato.  Stir until the onion has softened, about 5 minutes.

Transfer the onion mixture to a large bowl.

To the onion mixture, add the enchilada sauce, sour cream, and 1/4 cup chicken broth, shredded chicken, and tortilla triangles.

Stir carefully, making sure everything gets combined and coated.

Spray a 13x9 baking dish with non-stick spray.  Spoon the entire mixture into dish and spread evenly.

Cover with foil and bake 20 minutes.  Remove the foil and spread the shredded Pepper Jack cheese all over the "enchiladas".  Bake uncovered 10 more minutes.

Serve with your favorite rice and beans.  

I drizzled some avocado crema over my portion...took it to a whole new level!

Enjoy!

Two Years Ago: No Post
Three Years Ago: Maui Wowie Shrimp
Nine Years Ago: Margarita Cupcakes


Sunday, April 16, 2023

8th Annual Masters Champions Dinner and The Secret Door


Last night was our 8th Masters Champions Dinner...and it did not disappoint.  So much fun bringing in old friends, new recipes and many, many, many laughs.


Shout out to Scottie Scheffler for one of the most fun and delicious menus we've had the pleasure to put together for our annual event.
 

Cheeseburger Sliders Scottie-Style

~ and ~

Firecracker Shrimp

All of our couples friends soared at their assigned dishes.  I could have been completely fine with the appetizers...I was stuffed!!

After our Tortilla Soup, Ribeye Steak, and Blackened Redfish, we pushed through to make room for dessert.  I had so much fun putting this platter together.  I must remember this for future events.


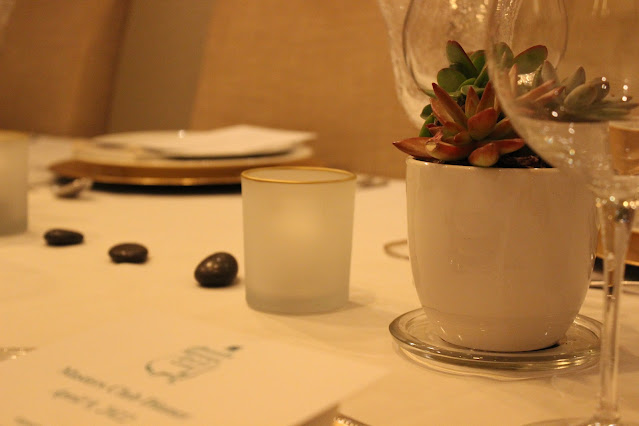
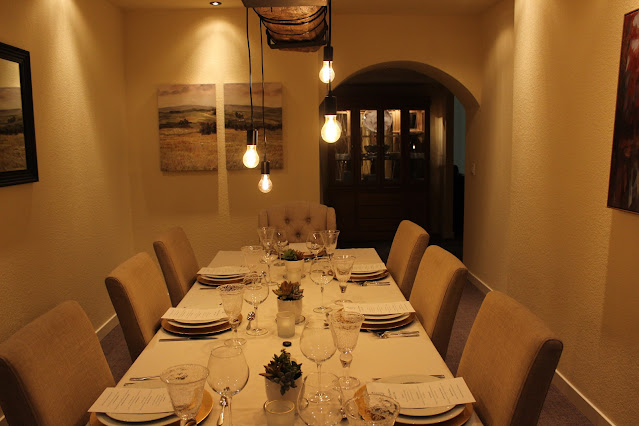
Table setting complete and we are ready for a proper 19th hole feast.

As always in our tradition, everyone receives their personalized custom menus to take home.

This year's big reveal was the secret door.


This door has been four years in the design, engineering, and building phases to get to where it now stands today.  

When we started our downstairs build-out, we knew that we wanted to have an artful closure to hide the mechanical room.  So of course what do you build in your wine dining grotto...a murphy secret door that also serves as your wine racks display.

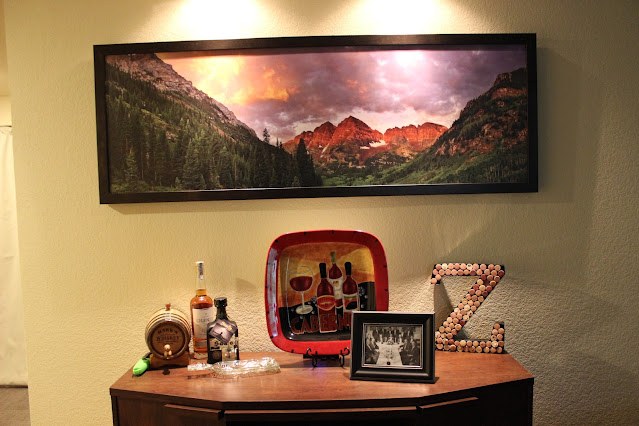
But of course, no wine cellar would be complete without it's dedicated family vintage signage.


Cheers!

Two Years Ago: No Post
Six Years Ago: Creamy Rosemary Potatoes
Nine Years Ago: Bunny Bundles

Friday, March 17, 2023

Basil Butter


Happy St. Patrick's Day to you all.  As green is in the air, so are my starter plants.  We are getting ready and planning this year's "crops" for our backyard garden.

Last year my basil, zucchini, and romaine took over and I couldn't keep up with them.  This year, I am determined to brush up on recipes sooner than later, so I am prepared to use everything at the ready.


Due to last year's basil harvesting, I became obsessed with compound butters...especially Basil Butter.  I mean obsessed!  It's the easiest accoutrement you can make and yet so complex in beautiful flavor.

This is how it goes...

Take a large handful of basil leaves and give them a spin in your food processor.


Next, add one stick (1/2 cup) softened butter in with the basil and let them dance around 
in the processor.


Isn't that just the most beautiful sight....ever!?!?

Put the blended butter and basil leaves in a ramekin dish, smooth the surface out.  
Sprinkle a little sea salt on top and let chill in the refrigerator for a couple hours.


I like to enjoy this luscious basil butter on a Saltine cracker for a little afternoon treat.  Which by the way, I recently read that some foodie claims that they just discovered butter on saltines as the latest gourmet food rage.  Are you kidding me??  This was a staple for me growing up in the 70's (with my glass of Tang)...of course, we could not afford butter, so it was margarine.  And now it's considered trendy?  I am truly speechless.


This basil butter is also fantastic on a steak with a little blue cheese crumbles, or your favorite grilled fish.

Enjoy!

Eight Years Ago: Blarney Bark

Wednesday, August 24, 2022

Peach Sangria

I hope your summer is going well as we are now starting to feel fall around the corner.  I have already began pulling some of the garden and flowers up as I think they have all reached their peaks.

It's Peach Festival season here now with fruit stands and farmers markets featuring the famous Colorado Palisades peaches on every corner.

In addition to my new favorite summertime drink with this Peach Sangria, here are a few of my other favorite peach recipes from years past.  Enjoy!


Peach Sangria

1 bottle Pinot Gris, chilled
1 cup peach flavored juice
1/2 cup peach Schnapps
4 peaches, sliced
1 cup raspberries

Mix all ingredients in a large pitcher.  Chill for at least 4 hours.  Serve in wine glass over ice.

Cheers!

One Year Ago: No Post
Four Years Ago: No Post
Nine Years Ago:  Puttanesca Pasta Night

Wednesday, August 17, 2022

Tropical Sushi Shrimp Stacks


I was recently back in Alaska visiting my family and friends for a few days before the rainy weather set in.  No such luck.  It rained and rained...and rained.

My friend Felicia made arrangements for us to do Reindeer Yoga one night.  Yes, you read that correctly.  Reindeer Yoga!  Can you even imagine?  Well, unfortunately I am going to have to imagine until next June.  The weather did not cooperate, so we had to cancel.

I decided to make it up to her by making us dinner at her house and enjoy the movie The Lost City (which as a side note, if you have not seen this movie yet...what are you waiting for??)  

At any rate, Felicia is a vegetarian, which I love that it challenges me to look for and try new things.  I thought something shrimp themed would be fun.  Then I thought, let's stack our dinner sky high while we're at it, just to add to the adventure.

Back in the day, "stacked" food was quite the trend and I (of course) had an entire set off difference shape and sizes of stacking templates to make appetizers, dinners, and desserts.  To this day, I have no idea where those templates ended up.

So I found my self literally in the middle of Alaska trying to find stainless steel food molds.  Nothing.  Time was running out and so were my options.


The good thing about remodeling my house these past 4 years is that I know every aisle and product in Lowes, Home Depot, and ACE Hardware.  The bad thing about remodeling my house these past 4 years is that I know every aisle and product in Lowes, Home Depot, and ACE Hardware.

As I was driving from place to place to look for these rings it hit me...!  PVC pipes!!!  I know they come in all heights and diameters.  I also know that the PVC material is non-stick, like stainless steel so the stacks will slide right out.

Lowes was on the way to Felicia's house.  I knew the exact aisle to find them and within 5 minutes I had my shrimp stack "food molds" bagged up and was back on the road.  I love it when a vision and plan comes together.  Don't worry, I washed and scrubbed the PVC pipe prior to use...although their scanning stickers would not come off the outside!

These shrimp stacks were like a sushi roll taken to a new dimension!  I cannot wait to make these again, they were awesome!  I did take a few shortcuts because after all we had Channing Tatum and Brad Pitt waiting for us in our after dinner movie.
 

Tropical "Sushi" Shrimp Stacks 
Makes 2 serving stacks

PF Chang's Dynamite Sauce (or make your own Sriracha Mayo sauce)
Guacamole (preferably homemade, or your favorite brand)
Trader Joe's Pineapple Salsa (or Newman's Own Mango Salsa)
7.4 ounce Annie Chun's Sticky Rice
Fresh Gourmet Wonton Strips
4" diameter stainless steel food mold, or PVC pipe

Maui Wowie Shrimp:
1 pound uncooked medium shrimp, peeled, deveined, and tails removed
1 pinch garlic salt
1 pinch ground black pepper
1/4 tsp cayenne pepper
1/2 cup mayonnaise
1 lemon, cut into wedges

Preheat outdoor grill for medium heat, and lightly oil the grate.  (you can also do this on a grill pan over your cooktop)

Thread shrimp onto skewers.  Season both sides of shrimp with garlic salt and black pepper, and cayenne pepper.

Generously coat both sides of shrimp with mayonnaise.

Cook shrimp on heated grill until shrimp are bright pink on the outside and opaque on the inside, and the mayonnaise turns golden brown, 5 to 10 minutes on each side.  Squeeze with fresh lemon wedges.  Set aside and let cool.

Make the sticky rice according to package directions.  Set aside and let cool.

While the rice is cooling, give the cooked shrimp a rough chop.

To Assemble Stacks:
Place a food mold on each plate.  Divide the rice evenly and spoon into each mold, pressing down to compact the rice.  Place 1/2 cup of the cooked shrimp on the rice and press down.  Spoon a thin layer of guacamole to completely cover the shrimp.  Using a slotted spoon, add a thin layer of pineapple (or mango) salsa on top of the guacamole, making sure to cover. (I use a slotted spoon, so that I get more of the fruit and less juice, so it doesn't get soggy). Lightly drizzle the Dynamite sauce over the salsa.  Place the wonton strips on top.  Carefully hold the wonton strips to secure the stack as you slide and remove the mold.

One Year Ago: No Post
Four Years Ago: No Post
Five Years Ago: Caprese Chicken Lasagna

Wednesday, May 4, 2022

Mexican Crispy Roasted Potatoes for Cinco de Mayo


Cinco de Drinko Mayo is tomorrow!  Lots of wonderful food...some tequila may be involved and then back to more and more food.

I'm looking forward to trying some new items and remaking some favorites.  We love to make our own salsa and guacamole from scratch here with the freshest of veggies, herbs, and spices.

Unfortunately I end up "taste testing" a little too much and then have no room for dinner.  Luckily most everything can be stored up for awesome lunch leftovers.

These Mexican Crispy Roasted Potatoes are unreal!!!  Not only are they great with steak, they also pair beautifully with chicken.  I hope you enjoy them as much as we do.  Stay safe tomorrow, be well and keep on sparkling!


Mexican Crispy Roasted Potatoes
Courtesy of Isabel Eats

1-1/2 pounds petite red potatoes, washed and quartered
2 Tbl olive oil
1-1/2 tsp salt
1/2 tsp ancho chili powder
1/2 tsp dried oregano
1/4 tsp coriander
1/4 tsp garlic powder
1/4 tsp black pepper
1 pinch cayenne pepper
1/2 cup freshly grated Parmesan cheese
4 Tbl finely chopped cilantro (optional)

Preheat oven to 400 degrees.  Line a baking sheet with parchment paper or spray with non stick cooking spray.

In a large bowl add the olive oil, salt, chili powder, oregano, coriander, garlic powder, black pepper, and cayenne pepper.  Add potatoes and toss until potatoes are full coated with spices.  Transfer to baking sheet.

Do not overcrowd the potatoes, as they need plenty of room to breathe so they can crisp up.

Sprinkle potatoes with Parmesan cheese and bake for 20 minutes.  Remove from oven, flip over the potatoes and bake for another 20 minutes until crispy.

Sprinkle potatoes with cilantro if desired and more salt, if needed and serve.

One Year Ago:  No Post
Two Years Ago: Maui Wowie Shrimp
Eight Years Ago:  Margarita Cupcakes


Wednesday, April 27, 2022

Zucchini Muffins with Chocolate Chips

Today I was going to share a recent Mascarpone Mixed Berry Cake with you.  However, I have lost the photos.  I mean really lost them.  I have looked in camera, computer, phone.  I cannot find them.  It's just been that kind of a week and the fact that I am on the downward side of 55 years, well let's just say life is getting a little more challenging as the days go by.

So, stay tuned...I will have to make the Berry Cake again and reshoot the photos and share with you on a future date.


In other news, my coworkers have been extremely naughty as of late.  Destructive is more of a better description.  This photo (above) is just a small sample of the crime scenes I have been walking into when I return home from a work errand.

Don't let these cute cuddly faces fool you.  They pretend to be good when I am in the office, but if I step out for 10 minutes...there's no telling what I will come home to. 

Anyone else out there have coworkers like this??


We are in the preparation stages and research for our garden now.  I'm really looking forward to some fresh veggies and herbs to harvest this summer and try out some new dishes.

My new zucchini I know will be perfect for these.  I actually made these muffins last year (it's a miracle I found the old photo in my batch).  They are so delicious and comforting especially when you need to start your day off with a little something sweet to prepare your soul for any misbehaved coworkers.  Enjoy!


Zucchini Muffins with Chocolate Chips
Courtesy of Once Upon A Chef with Jenn Segal

2 cups all-purpose flour, spooned into measuring cup and leveled-off
1/2 tsp baking soda
1/2 tsp baking powder
1/2 tsp salt
2 tsp ground cinnamon
1/4 tsp ground nutmeg
1 stick (1/2 cup) unsalted butter, melted
1 cup packed light brown sugar
2 large eggs
2 tsp vanilla extract
1 medium (9 oz) zucchini, grated (no need to wring dry)
1/2 cup plus 2 Tbl chocolate chips
2/3 cup chopped pecans or walnuts (optional)

Preheat oven to 350 degrees and set rack in the middle position.  Generously coat a muffin pan with non-stick cooking spray.

In a medium bowl, whisk together the flour, baking soda, baking powder, salt, cinnamon, and nutmeg.  Set aside.

In a large bowl, whisk together the melted butter and brown sugar.  Add the eggs and vanilla extract and whisk to combine.  Stir in the zucchini.

add the dry ingredients to the zucchini mixture and stir until just combined.  Stir in 1/2 cup of the chocolate chips and all of the nuts (if using).

Using a large spoon or ice cream scoop, divide the batter into the muffin wells, filling each almost completely.  Sprinkle the remaining 2 tablespoons of chocolate chips onto the muffins, pressing them in lightly so they adhere.

Bake for 20 to 22 minutes, or until a tester comes out clean.

Allow the muffins to cool for 10 minutes in the pan, then transfer to a wire rack to continue cooling.  Serve warm or at room temperature.

One Year Ago: No Post

Wednesday, April 20, 2022

Bami Goreng

Perhaps I am still spinning from our Asian fusion dinner from the Masters last week, or perhaps I am just really craving homemade authentic Asian cuisine.  Either way, I got very lucky stumbling (okay I actually was down one of my infamous rabbit holes that I have no idea how it got started) on this dish from Valerie Bertinelli.


Valerie says this is one of Mrs. Van Halen's favorite dishes of her son Eddie.  I must admit, it is now one of my favorites too!  LOVE this dish!!  It has so many levels of flavor that just keep on giving and giving.  Best part...it's even better the next day as leftovers.  I hope you enjoy it too.

P.S.  I recommend doubling the (Ketjap Sambal) sauce!  Yummy!!


Bami Goreng
Courtesy of Valerie Bertinelli

Ketjap Sambal
1 Tbl canola oil
2 tsp minced garlic (1 to 2 cloves)
2 tsp grated fresh ginger (a 1-inch knob)
2 tsp minced seeded jalapeno
1/4 cup packed light brown sugar
1/4 cup tamari
1/2 tsp five-spice powder
1/4 cup water

Bami Goreng
1 Tbl canola oil
1 cup thinly sliced red onion (1/2 onion)
2 tsp minced garlic (1 to 2 cloves)
2 ts grated fresh giner (a 1-inch knob)
1 cup thinly sliced red bell pepper ( 1 bell pepper)
8 ounces pork tenderloin, sliced into 1/4-inch rounds and halved crosswise (or use chicken thighs)
Kosher salt
2 cups thinly sliced Napa cabbage
1 Tbl sambal oelek (fresh ground chili paste) or can substitute with Sriracha
8 ounces thin spaghetti, cooked
Lime wedges for juicing and serving
Roughly chopped cilantro leaves, for garnish (optional)
Fresh bean sprouts, add right before serving on top (optional)

For the Ketjap Sambal:
Heat the canola oil in a small saucepot over medium heat.  Stir in the garlic, ginger, and jalapeno and sauté until fragrant but not yet browned, 2 to 3 minutes.  Add the brown sugar, tamari, five-spice powder and 1/4 cup water.  Bring the mixture to a simmer and cook until the sauce reduces and coats the back of a spoon, about 10 minutes.  Remove from the heat and set aside.

For the Bami Goreng:
Heat the canola oil in a 12-inch sauté pan over high heat.  Add the red onion garlic and ginger and cook until softened.  Add the red pepper.  Sprinkle the pork tenderloin with salt and add it to the pan; cook until browned on both sides, 3 to 4 minutes total.  Add the cabbage, stir in the sambal oelek, and then deglaze with pan with 1/4 cup water.  Cook for 2 to 3 minutes, until the water is evaporated.  Finally, add in the cooked spaghetti and half of the ketjap sambal.

Transfer the bami goreng to a large bowl and drizzle with the remaining ketjap.  Add a squeeze of lime and garnish with cilantro and/or bean sprouts.  Serve with extra lime wedges on the side.

One Year Ago: No Post
Eight Years Ago: Cheese Souffles

Wednesday, April 13, 2022

7th Annual Masters Champions Dinner and Featuring The Augusta Azalea Cocktail


It's spring and around here that only means one thing (other than relentless snow blizzards)...it's golf season and time for The Masters and Champions Dinner.


This is our 7th year hosting the annual event.  If you're new here to this site my husband is an avid golf fan and add to that I love to host themed dinners.  This adds up to the Champions Dinner every year.


Each Masters winner must host a dinner for prior Champions every year during Masters week before the official tournament begins.


This year Hideki Matsuyama hosted a phenomenal dinner as a tribute to his Japanese heritage.  I wait and wait for the big dinner menu to be revealed then it's off to the final planning stages.  


Each couple is assigned a course from the dinner menu.  As hosts, we always take the main dish and take care of all the set up and details...including everyone's commemorative, personalized menu place card.


This year since our lower level is finally complete, we were blessed to have the inaugural event in our new Dining Grotto, which was just so much fun to share with everyone.


As always, the original Masters Champions Dinner portrait makes its return appearance front and center in the new bar area.


Speaking of bars...this Azalea Cocktail is by far my absolute new favorite libation!  I will be enjoying these all summer long.  I hope you enjoy them too.


Augusta's Azalea Cocktail

5 ounces lemonade, fresh-squeezed
1/2 ounce Grenadine
1-1/2 ounces Vodka
1 Maraschino cherry, garnish
1 slice orange, garnish
dried rose petals, optional

Place martini glasses in freezer one hour before serving time.

Combine the lemonade, grenadine, and vodka in a cocktail shaker with ice.  Give it a really good shake!

Strain the contents of the shaker into a chilled martini glass.

Garnish with Maraschino cherry and a slice of orange.  Add a couple tiny dried pink rose petals for floating on top.

Cheers!

One Year Ago: No Post
Five Years Ago: Creamy Rosemary Potatoes


Wednesday, April 6, 2022

Pear, Goat Cheese, and Sausage Pizza...the new Picture Perfect Window Wells


We are finally starting to see the light at the end of the tunnel....or at least in our window wells.  During our downstairs build-out/remodel, we decided that the window wells needed some love too.

We went to such lengths with every detail on the interior of the new areas that we just couldn't take the sight of our window wells ruining the views.

My husband obsessive-bee in the bonnet-contractor researched and researched what our options could be in these wells.  He found a company that makes custom window well cover liners and that's all it took to start this train.

After much patience, time, measuring and re-measuring, we were up and running.  I think he had more fun accessorizing the bottoms to coordinate with the decorative liners more than anything.  Needless to say, there were many trips to our local stone yard, Lowes, Hobby Lobby, and Michaels.  The results were awesome!  


"Before" all the lower level window wells.


The golf themed window (because of course)...and yes that is an actual golf ball we added as accessory.


So perfect for our game and movie room areas.


Up next, the "Aspen Suite".


I actually had to rummage through a local wood yard to find small pieces of Aspen and Birch trees.


And finally, the "Lodge Room".


My favorite piece is the tiny little canoe I purchased for "on the bank" of the creek.


That my friends, is our new window well reveal and we are so thrilled with how all of the windows turned out to coordinate with their rooms.

Since this took more time than we expected, I obviously have needed quick go-to dinners.  This pizza was amazing!  I love how the pear and basil just popped with freshness in every bite.  I hope you enjoy this as much as we did.

Pear, Goat Cheese, and Sausage Pizza

1 ready made pizza crust (we used Caulipower plain pizza crust)
pinch of ground black pepper
pinch of salt
1 Tbl crushed garlic
1 bartlett pear, thinly sliced
6 ounces shredded Mozzarella cheese
3 ounces crumbled goat cheese
6 ounces Italian sausage, cooked and crumbled
Honey (for drizzling)
1/4 cup fresh basil leaves, sliced into thin ribbons

Preheat oven to 400 degrees.  

On a large sheet pan, cover with parchment paper.  Place pizza crust on pan.  Brush top of crust evenly with drizzle of olive oil and brush oil to cover.  Sprinkle with salt and pepper.

Layer pears, mozzarella, goat cheese, cooked Italian sausage and crushed garlic over pizza. 
Bake 11-14 minutes until crust is golden and cheese is melted.

Remove from oven and drizzle with honey.  Sprinkle basil ribbons over pizza.  Slice and serve warm.


One Year Ago: No Post
Two Years Ago: Derby Dip and Dum-Dum
Four Years Ago: White Trash Cookies
Five Years Ago: "Clinks" Spinach Salad