Tuesday, August 25, 2020

Yellow and Red Tomato Pico De Gallo and Pictures

Summer continues to heat up here, however I am starting to see a few trees turn their magical leaves that fall golden color...I have very mixed emotions about this...very mixed.

We are needing to use up everything in the garden before we lose it all.  It is an interesting challenge and I have never Googled so many..."what to make with..." fresh veggie/herb recipes in my life!


The fruits of our harvest that desperately needed a home...pico de gallo it is!


Yesterday was the girls' first day of "16th Grade", aka, the start of their University Senior year.  Oh my goodness, I was just putting them in Pre-Pre-K yesterday...

Now that they are both settled in their new places, my husband is back at his city office, and things are quieting down here at home.

I have started making my own blank greeting cards.  My grandma was known for her DIY recycled cards.  Now mine don't even come close to her creations.  However, I love photography and thought these would be fun to make, using my my leftover photo paper and scrapbook pages.  So fun, easy, creative and very relaxing for me.


I hope you enjoy this pico del gallo as much as we did...it's super easy and great blend of flavor!  Stay healthy and keep on sparkling!


Yellow and Red Tomato Pico De Gallo
Courtesy of HealthySeasonalRecipes.com

3 cups diced yellow and red tomatoes
3/4 cup chopped cilantro
1/2 cup minced red onion
2 Tbl minced jalapeno (with seeds to taste)
2 Tbl lime juice
1 tsp salt

Stir tomatoes, onion, cilantro, jalapeno, lime, and salt together in a medium bowl.  Serve immediately or chill.

Great to serve as a dip for chips, or top your favorite tacos, salad, or enchiladas!

Two Years Ago: No Post
Seven Years Ago:  Puttanesca Pasta Night


Saturday, August 22, 2020

Raisin Bran Muffins and Butterflies

Like many places in the U.S. right now, we are also experiencing devastating forest fires.  It's been terribly smoky and eerie skies all day and night.  Our local paper has let everyone know that many animals, birds, and insects are all coming down from the mountains, so to be aware and cautious.


Last night we dined at one of our newest restaurants and here was our sunset view.  Incredibly sad to see the smokiness, but yet such a rare sight to see.


Among my grandma's many wonderful recipes and memories are her Raisin Bran Muffins.  They are so good, fulfilling, and I love how she added an option to her recipe to add melted butter, cinnamon, and sugar to the top before baking.  

Grandma always started and ended her days with a little something sweet at her meals and I just love that!  Why not, right?!


Grandma also loved butterflies.  I will never forget when she taught me about her "butterfly kisses" that she would give my daughters when they were babies.  They would laugh and giggle when she delivered her special kisses to them.

This was one of my grandma's morning cups.  She would enjoy tea or hot cocoa out of it.  I am so grateful and blessed to have it now.  It gives me so much joy and happiness in the mornings and always touches me with memories.

I have been seeing many butterflies around our area and backyard.  It could be because of the surrounding fires, but I like to think it's my grandma stopping by to say "hello".


I had forgotten until I was in the middle of making these beauties how many muffins this recipe actually makes.  It was too late for me to turn back, so now I have enough muffins (which had to be frozen) to last me until the end of this year!

I hope that these bring a little sunshine and happiness to start your day like they do for me.  Enjoy!


Raisin Bran Muffins
Courtesy of GGMa

*This recipe makes 6 dozen muffins (portions can be cut in half)

5 cups all-purpose flour
3 cups granulated sugar
5 tsp. baking soda
1-1/2 tsp. salt
7-1/2 cups (15 ounces) Post Raisin Bran cereal
1 quart low fat buttermilk
1 cup vegetable oil
4 eggs, beaten

Preheat oven to 400 degrees.

In a very large (restaurant size) bowl, blend flour, sugar, baking soda, and salt.  Stir in cereal.  Add buttermilk, oil and beaten eggs and blend until dry ingredients are moist.

Fill muffin tins 2/3 full.  Bake for 15 to 20 minutes.

*** If desired lightly brush melted butter over batter and sprinkle with cinnamon and sugar before baking. 

Two Years Ago: No Post
Six Years Ago:  BBQ Ranch Grilled Chicken
Seven Years Ago:  Puttanesca Pasta Night


Tuesday, August 18, 2020

Copycat Fuzzy's Fuzzy Peach


One of our favorite taco stops is Fuzzy's Taco Shop.  Luckily there is not one too close to me, because I would probably go there every day!  Their Queso dip is out of this world and I would be perfectly happy just to sit and eat that for lunch...and won't apologize for it. ;)  Along with their chicken tacos, which I also love, is their Fuzzy Peach drink!  

This week I delivered a meal train to a friend recovering from surgery and brought her my Honey Lime Chicken Enchiladas and BLT Slaw with Cilantro Lime Crema.  I made half a pan for her family, and half a pan for me and my husband to have that night for dinner.

The Fuzzy Peach drink came to mind and I thought it would perfectly compliment the enchiladas...it did!


Unfortunately it was not easy to even find the drink ingredients online, as they don't post their drink menus on the website.  It actually took me while to find that (thank goodness) someone posted a photo of it...thank you whoever you are!

My daughter and I played with the ingredients and realized their menu was missing the peach juice (must be a secret ingredient, like KFC chicken seasonings, right?)  Anyway, we tried the first batch and it tasted like sun tan oil (figured out too much Malibu rum).  So, I backed off on that and we made another batch.  Nailed it the 3rd time...you're welcome!


Copycat Fuzzy's Fuzzy Peach
Serving Size: 1 Drink

1 shot Peach Vodka
1/2 shot Malibu Rum
1 shot Simply Peach Juice
Sprite
ice

In a shaker, add ice, peach vodka, Malibu rum, and peach juice.  Shake well and pour into a tall glass.  Top with Sprite and stir until completely combined.

*Enjoy responsibly, or even better to drink this at home, as it packs a bit of a punch...one and done!

One Year Ago:  Peach Mustard Glazed Pork Tenderloin
Two Years Ago:  No Post
Three Years Ago:  Drumstick Pie and Dorm Survival Baskets
Four Years Ago:  Zucchini Pie and School Week Meal Prep
Five Years Ago:  "Eat The Cookie...Buy The Shoes"
Six Years Ago:  BBQ Ranch Grilled Chicken
Seven Years Ago:  Flat Iron Steak Salad After A Day At Flatiron Crossing Mall

Saturday, August 15, 2020

Sheet Pan Lemon-Chicken and Asparagus with Hollandaise

I don't know where you live, but here it's been a cook'n hot summer.  I'm not going to complain because as I told my husband last week...enjoy it now...you're going to have your snow blower fired up and working again to clear the driveway and sidewalks before you know it.

It's been so warm that I had to purchase two small kiddo pools for the pups and they are loving it!  While they rest from their pool time, I head over to our community pool for an hour or so, for some self-care me time...actually I'm just trying to beat my husband's golf tan!


So between the heat, and trying to cook for our empty house again, I am loving this sheet pan dinner and look forward to trying out other test sheet pan meals.  So easy and so delicious!  Honestly, clean up is the best part though.

I hope you are all staying healthy, happy...and sparkly!


Sheet Pan Lemon-Chicken and Asparagus with Hollandaise

4 small chicken breasts, boneless and skinless
1/3 cup lemon juice
1/4 cup honey
1 Tbl soy sauce
1 Tbl garlic, minced
1/2 tsp herbs de provence
1 Tbl parsley, fresh, finely chopped
salt and pepper
1 bunch asparagus, ends removed, rinsed and dried
1 lemon, sliced
hollandaise sauce, prepared

Preheat oven to 400 degrees.

Line a baking sheet with foil and spray with nonstick cooking spray.  Place chicken breasts on sheet pan and season lightly with salt and pepper.

In a small mixing bowl, combine the lemon juice, honey, soy sauce, garlic, herbs de provence, and half of the parsley.  Pour half of the mixture over the chicken and place the lemon slices on top.

Cover with foil and bake for 20 minutes, or until the chicken is cooked through.  Remove sheet pan from oven and set aside.  Set oven to broil setting.

Uncover and place the asparagus around the chicken.  Pour the remaining lemon mixture over the asparagus.  Season the asparagus with salt and pepper.  Return sheet pan to oven and broil until the chicken is golden and the asparagus is cooked.

Drizzle the chicken and asparagus with a small amount of warmed hollandaise sauce, sprinkle with remainng fresh parsley, and serve with rice pilaf.

Enjoy!

Two Years Ago:  No Post
Three Years Ago:  Caprese Chicken Lasagna
Seven Years Ago:  Snickerdoodles At End Of Summer


Tuesday, August 11, 2020

Quick & Easy Refrigerator Pickles

We have a new challenge in our home, which is never a good thing.  To say that our family is competitive would be a tremendous understatement.


Our garden, with the addition of overflowing dill, we now have an abundance of pickling cucumbers.  My husband was going to make his annual pickles, but the cucumbers are maturing so fast, we cannot keep up with them.

I had a bowl of cucumbers freshly picked that needed to have something done to them, before they spoiled.  I thought I would try my hand at pickles while my husband was at his away office, so I could surprise him (with my challenge) when he returned home.  I didn't want to go through the whole day project of boiling, chopping ingredients for 30 jars of pickles...I just wanted to use up these veggies.

This recipe is awesome!!  Super, super easy and they turned out amazing.  I am loving these little beauties.  I even just grab a couple pickle chips at a time to snack on.  Yummy!!

Stay healthy and sparkly this week!


Quick & Easy Refrigerator Pickles
Courtesy of Once Upon A Chef

1-1/4 cups distilled white vinegar
3 Tbl kosher salt
2 Tbl sugar
2 cups cold water
1-3/4 to 2 pounds Kirby cucumbers (about 6) cut into halves for spears
2 Tbl coriander seeds
6 large garlic cloves, peeled and halved
1 tsp mustard seeds
1/4 tsp red pepper flakes
16 dill sprigs

Combine the vinegar, salt, and sugar in a small non-reactive saucepan (such as stainless steel, glass, ceramic, or Teflon) over high heat.  Whisk until the salt and sugar are dissolved.  Transfer the liquid into a bowl and whisk in the cold water.  Refrigerate brine until ready to use.

Stuff the cucumbers into two clean 1-quart jars.  Add the coriander seeds, garlic cloves, mustard seeds, red pepper flakes, dill sprigs, and chilled bring into jars, dividing evenly.  If necessary , add a bit of cold water to the jars until the brine covers the cucumbers.  Cover and refrigerate about 24 hours, then serve.  Cucumbers will keep int eh refrigerator for up to one month.

Two Years Ago: No Post
Four Years Ago:  Key Lime Jalapeno Cake
Seven Years Ago:  Snickerdoodles At End Of Summer


Sunday, August 9, 2020

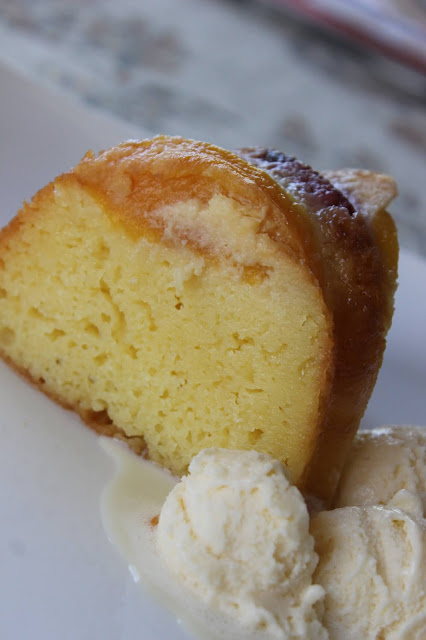
Raspberry-Peach Pound Cake

Summertime in Colorado is known for many things but especially this time of year.  The Palisade Peaches are among the best in North America and sell out in record time every summer by the case load.


Every farmers market, roadside stand, and fundraising group have these famous peaches from only July through September.  The best part is every restaurant has some type of special peach drink, salad, or dessert featured item on their menus...including our very own A&W Drive-In restaurant featuring their annual Peach Shakes.


The local printing company that we purchase our business stationary, etc. from does a great marketing promotion every summer..."Pie in July".  With your purchase of $$ items, you get to pick out a free pie of your choice.  This year they had Raspberry-Peach pie!  I had never heard of that combination in a pie, but it sounded so good.

In fact I tried it and loved it...enough to try my hand at making a pound/bundt cake with the same fruit duo.


Since this cake is a little on the rich side (but oh so worth it), I paired it with a couple tablespoons of Halo Top's "Peaches & Cream".  Dear Heaven!!!  This is such an awesome dessert for a cool summertime treat and I loved the pairing of it with the cake.

Keep staying healthy, sweet, and sparkly!

Enjoy ;)


Raspberry-Peach Pound Cake

1 box, butter yellow cake mix
3 eggs
1/2 cup water
1/2 cup sugar
3/4 cup canola oil
1 cup sour cream
1 (3.5 ounce) small vanilla pudding mix
1 (6 ounce) container fresh raspberries
1 peach, cut into 8 wedges and skin removed

Preheat oven to 350 degrees.

Mix everything (except the rasperries and peaches) together with an electric mixer.

Grease and flour a bundt pan really well.  Line the bottom of the pan with the fruit, alternating between the raspberries and peach wedges.

Pour the cake batter over the fruit.  Bake for 50-55 minutes, or until cake is set in the middle.
If it is starting to brown on top before cake is cooked through, loosely put a piece of foil on top to prevent from burning.

Remove from oven and cool for 15-30 minutes, then remove from pan.  Serve at room temperature or chilled.

Two Years Ago: No Post
Four Years Ago:  Key Lime Jalapeno Cake

* Since we can't (and should not) have an entire bundt cake at the ready on my kitchen counter, I decided to cut it up for individual serving size portions and freeze them.  This way, if I am wanting a little special treat it is ready and waiting for me at a moments notice.


Thursday, August 6, 2020

Steak au Poivre, Projects, and Bad Pups


After two years of being in our home, we my husband is making great progress in our downstairs level.  We just had the second load of lumber delivered for Phase 2 of the remodel/build-out.  He is tackling it for about 2 hours every night after work, to try and stay on schedule.  We have a long road ahead but it is definitely doable and we are starting to really see it come together and visualize the finished product.


Standing in the gaming/entertainment area looking at bedroom framing.


The entrance to our dining / wine room grotto.


The future kitchenette.


This is the picture of utopia in a pup's eyes.


Ever since the plywood saw has started up and remnants fall in the work zone, little "gremlin puppies" show up at our house in the middle of the night.  Apparently it is super fun to run downstairs in the middle of the night, pitch dark and find your favorite piece of plywood.  Then, (in the quietest stealth mode) you bring it back upstairs and shred it...and shred it some more...and keep shredding until you have left tiny toothpicks in the carpet for your people to step on first thing in the morning.


There is now a baby gate at the top of the stairs to keep out nightly gremlins!

Have a blessed, happy, and healthy day.


Steak au Poivre

Four 6 to 8 ounce filet mignons or your favorite cut steak
1 tsp kosher salt
1 Tbl whole peppercorns
1 Tbl canola oil
2 Tbl butter
1/3 cup finely chopped shallots from 1 medium size shallot
1 (8 ounce) package fresh baby bella mushrooms, cleaned and stems removed (keep whole)
1/2 cup beef stock
3/4 cup heavy cream
1 tsp Dijon mustard

Pat the steaks dry. Season the steaks all over with the salt.

Seal the peppercorns inside a small plastic bag and place on a hard surface.  Using a meat mallet or rolling pin, pound the peppercorns until they are coarsely crushed.  Press the crushed pepper evenly onto both sides of steaks.

In a large cast iron skillet, heat the oil over medium-high heat.  When the oil is hot and shimmering, add the steaks and cook for about 4 minutes on each side, turning once, for medium-rare (or 5 minutes per side for medium).  Transfer the steaks to a platter and tent with foil.

Pour off excess oil from the pan (do not wipe).  Lower the heat to medium-low and add the butter, shallots, and mushrooms.  Cook stirring constantly while scraping up the brown bits, until the shallots and mushrooms are golden brown and softened, 2 to 3 minutes.  Add the beef stock and boil, stiring to scrape up the bown bits, until the liquid is reduced by half.  Add the heavy cream and Dijon mustard and gently boil until thickened, about 3 minutes.  

Transfer the steaks to plates and spoon the sauce and mushrooms over top.

Enjoy!

Two Years Ago: No Post
Four Years Ago:  French Dip Date Night

You have no idea how painful this is to step on at 5 am!


Saturday, August 1, 2020

Overnight Sausage Pancake Breakfast Casserole aka Sausage McGriddle Bake


One of the most treasured things we love about our travels and road trips is breakfast. We love nothing more than finding mom & pop diners, cafes, and outposts to have some real authentic breakfasts.  Nothing says summer to me more than some good old fashioned, real down home cooking.


Well this summer, for obvious reasons, has been disappointing and very sad.  My heart breaks when we travel and I have seen all these places closed or go out of business.  We have been stuck with fast food drive throughs and quite frankly it's just not the same.


During our most recent trip, we couldn't even go in to sit down at fast food breakfast.  So there we were, in the middle of nowhere Wyoming, eating our McDonalds breakfast while standing up and tailgating in the parking lot with other families experiencing the same disappointment.  

I pray that this all changes sooner than later.  Until then, this breakfast casserole will take you right back to the first time you had a Sausage McGriddle with egg.  It is unreal how much this tastes like the famous breakfast sandwich.

*I will say one note; unless you are feeding a large crowd, I would half the recipe because it did not make great leftovers the next morning.

Also, this is designed for an overnight preparation, however I did it all in the morning and it still turned out amazing!  
Enjoy, stay healthy, and keep on sparkling this weekend!


Overnight Sausage Pancake Breakfast Casserole
Courtesy of @plainchicken

20 to 24 frozen pancakes from a 2lb-1oz. package, thawed
1 lb. ground maple breakfast sausage
6 eggs
1-1/2 cups heavy cream
1 cup whole milk
1 tsp vanilla
2 Tbl sugar
2 Tbl maple syrup, plus more for serving

Cut pancakes in half and place cut side down in a lightly greased 9x13 pan.

Cook sausage in a skillet over medium-high heat until no longer pink.  Drain fat.  Sprinkle cooked sausage on top of and in between the pancake slices.

Whisk together eggs, heavy cream, milk, vanilla, sugar, and maple syrup.

Pour egg mixture over pancakes.

Cover casserole dish and refrigerate overnight.

Remove casserole from refrigerator and uncover.  Preheat oven to 350 degrees.

Bake casserole uncovered for 50 to 60 minutes until center is set.

Let stand 5 minutes before serving with extra maple syrup.

Two Years Ago: No Post

Clean plate...it's THAT GOOD!!!


Wednesday, July 29, 2020

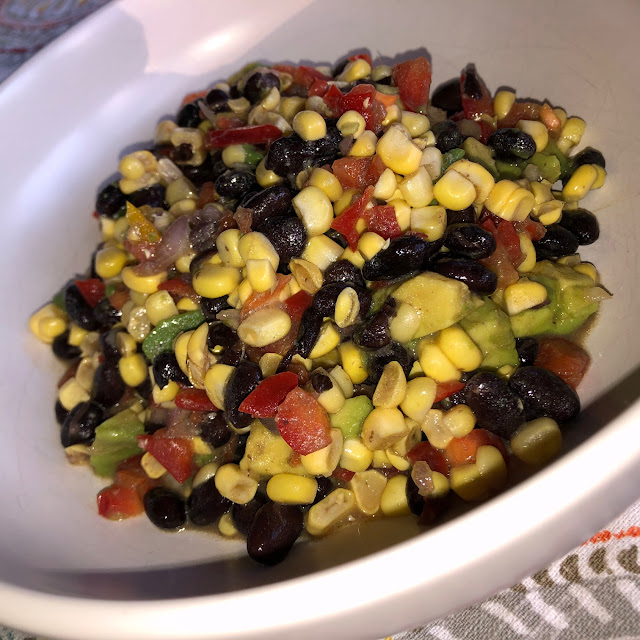
Black Bean & Corn Salad with Chipotle-Honey Vinaigrette


While we were on vacation (with 19 relatives, I may add), the bonus is that we all get to learn and try out new recipes from each other.

Brother Mike, brought his A game and took the challenge to cook his famous Mike's Marinating Mess chicken dinner for all of us the first night.  No room to be had on this bbq!


On the last family night, we decided to do Carne Asada for everyone with a fiesta theme...and many margaritas in store.  Sister Cathy made this incredible salad/dip which reminded me a lot of Cowboy Caviar.  It was so good that I made it again...and again, when we returned home!


In other news, (because there isn't enough excitement happening in our world), I had a dental emergency the other night.  I got a piece of food stuck between two of my teeth.  I tried to floss and it snapped off.  Now I had food AND floss stuck between my teeth.  I tried another piece of floss...SNAP!  Then by a desperate attempt, I tried a toothpick...SNAP! By this time it felt like a piece of plywood was separating my teeth and ruining all my orthodontic history.  I wanted to cry I was in so much pain.  Of course, I go into instant panic mode.  What am I going to do?  Is there an emergency dentist nearby?  Will my insurance cover this?  What if it doesn't?  What if I have to try to go through the night in this pain?...and on, and on, and on!!!


Once I calmed down and started thinking clearly, I was able to get it all figured out.  It was 9:30 at night and I jumped online to find out the nearest drug store that would still be open.  I had no idea what was going to get this mess out of my teeth...so I bought everything on the dental shelves!  It took every single one of these items to fix my emergency, and all was well once again.  Ugh!

Continue to stay safe, healthy, and sparkly!

Black Bean & Corn Salad with Chipotle-Honey Vinaigrette
Courtesy of Once Upon A Chef

For Salad:
2 ears fresh corn
1 cup chopped red onion
1 (14.5) ounce can black beans
1 red bell pepper, diced (about 1 cup)
1/2 cup loosely packed fresh chopped cilantro
1 avocado

For Dressing:
2 Tbl red wine vinegar
2 Tbl fresh lime juice, from 1-2 limes
2 Tbl honey
1/4 cup plus 2 Tbl vegetable oil
1 large garlic clove, roughly chopped
1/4 tsp dried oregano
3/4 tsp cumin'3/4 tsp salt
1/4 tsp black pepper
2 canned chipotle peppers in adobo sauce (2 peppers, not 2 cans; use smaller peppers and if they are all large, then just use only 1-1/2)

Bring a large pot of salted water to a boil.  Add the corn, cover, and turn the heat down to low.  Simmer for 10 minutes.  Remove the corn from the water and let cool.

Meanwhile, place the chopped red onions in a small bowl and cover with water.  Let sit about ten minutes, then drain completely in a sieve and set aside.

Place the beans in a sieve; run under cold water to rinse well.  Let drain completely and set aside.

Holding the cooled corn upright  in a large bowl, cut the kernels off the cob in strips.  Add the beans, red onion, red bell pepper and cilantro.

Make the dressing by combining all of the ingredients in a blender or mini food processor; process until smooth.

Pour the dressing over the salad and toss Well.  Cover and refrigerate for a least 1 hour or, preferably, overnight.

Right before serving, slice the avocado in half.  Remove the pit; using a butter knife, cut a grid in each half.  Holding the avocado halves over the salad, use a spoon to scoop out the diced flesh.  Toss the salad gently, then taste and adjust seasoning if necessary.  Add a squeeze of fresh lime, to freshen in up.  

Serve cold.

Two Years Ago: No Post
Four Years Ago: One Skillet Tuscan Chicken

Saturday, July 25, 2020

Scratch Waffles


Every weekend (and most days), my husband gets up around 4:30 am.  I do not...repeat...I absolutely do not get up that early on weekends or any other day for that matter.  With my "wackadoodle" sleep pattern right now, I am lucky to be getting back to sleep by 4 am.

When I finally rise out of bed and come out to the kitchen for my prepared cup of java, my husband always make sure that the drapes are open for me, to let in God's beautiful sunshine, which I do love to see every morning.


This one particular morning something looked off.  I couldn't quite figure it out, as I was still a little sleepy and coffee hadn't quite kicked in yet.  Do you see it?  Look closer...


Look very close...now you see it!  Are you kidding me?!?!?!  What in the world possessed him that early in the morning to actually go out to the garage, grab Brinkley's old dog collar and use it as a curtain tie?  (Which looking at the dog tag reminds me, I forgot to register our dogs with the Town this year...oops).


Well, at least Brinkley's celadon collar matches the curtain fabric...I do love that color, it's so calm and soothing.


In addition to my morning sunshine, we always make sure to have Sunday morning family breakfast together.  He knows that family meals are very sacred to me.  We always let "Baby B" select the menu, as she is our breakfast girl.


As you can see, this recipe has been around for about 30 years.  I finally asked him, "Is this one of your family's old recipes?"  His response, "No".  "I think I found it in an old Betty Crocker cookbook a long time ago."  We actually don't really know...

Have a blessed week and continue to be safe, healthy, and sparkly!


Scratch Waffles
Celebrating Weekends

1-3/4 cup all-purpose flour
3 tsp baking powder
1/2 tsp salt
2 egg yolks, well beaten
2 egg whites, well beaten
1-3/4 cup milk (whole or 2%)
1/2 cup canola oil
1 tsp vanilla

In a large bowl, mix the flour, baking powder, and salt.

In a medium bowl, whisk the egg yolks, milk, canola oil, and vanilla.

Add the wet ingredients to the dry ingredients.  Use an electric mixer to combine.

Fold in the egg whites.

Pour into your waffle maker and cook until done.

* Option, add your favorite fresh fruit or nuts to batter before closing waffle iron lid.

Two Years Ago: No Post
Three Years Ago: Watermelon Bruschetta
Four Years Ago: One Skillet Tuscan Chicken